One of our favorite art projects involves salad spinners! Yes, really. Spin painting is a mesmerizing process and lends itself perfectly to color our collection of fall treasures. Plus, it never fails to create stunning pieces of artwork. Seriously, you have to try this!
Materials:
- Tempera paint in squeeze bottles
- Trays
- Tarp
- Salad spinners
- Glitter
- Cardboard
- Oil pastels
- School glue
- Tissue paper shapes (round, square)
- Watercolor sets
- Paintbrushes
- Tape
- String
Step 1: Set up
Cover your floors with a tarp. Set out paint in squeeze bottles, glitter in shakers, your collection of fall treasures, trays and salad spinners.
Tip: It really makes a difference how you set out your art materials and whether or not a project looks inviting to children. I usually put much thought and preparation in how I display and arrange art materials. Try to set out a few materials that invite further exploration, make sure the children can reach everything without your help and look if what you provide sparks their curiosity enough so they will sit down and start exploring on their own.

Step 2: Add paint
Invite the children to join you and show how they can place an item of their choice in the salad spinner. Make sure to place one item at a time into the spinner so they don’t overlap each other.
Each child can pick a color and squeeze a few drops onto the objects in the spinner. We enjoyed squeezing paint and shaking glitter onto sticks, leaves and rocks.
Close the lid, work your muscles and start spinning!
Two to four children can share a spinner. This is the perfect opportunity to practice communication, sharing and taking turns. The children all added a drop of different colors and kept track of who’s turn it is to spin. While one child worked the spinner the other one’s helped to hold the spinner down. Teamwork!


Step 3: Admire
Remove the lid to see your colorful creations! This is the best part! The children’s expressions upon opening the spinner, seeing how the colors marbled and mixed, are absolutely priceless.
There’s no wright or wrong of creating, the children get to work independently and everything that comes out of that salad spinner just looks so beautiful while everyone can feel successful with it!
Make sure to provide some trays where the children can place their colored treasures to dry.


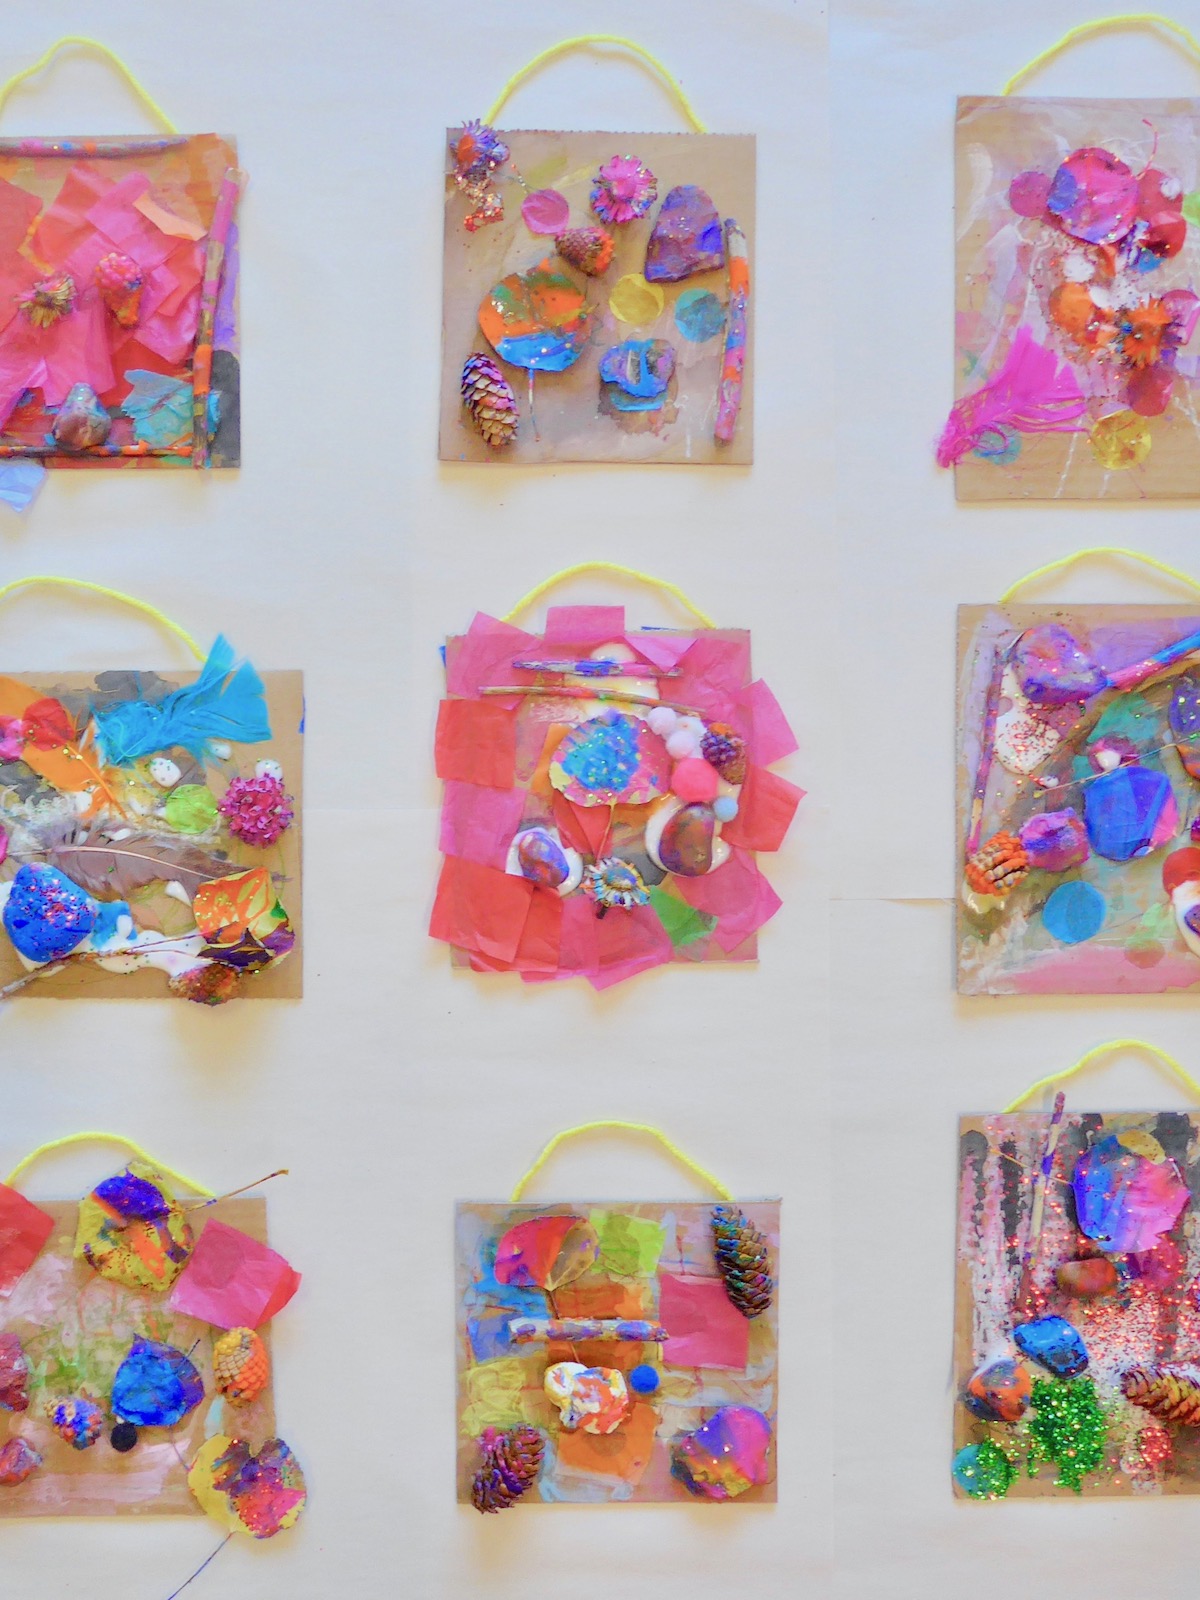
Step 4: Layer
We could not leave these colorful treasures without proper display and made Mixed Media Collages for them, possibly layering too many materials we’ll have to explore more slowly in future:
On cardboard we layered oil pastels and sharpies. After that I set out watercolors, glue and tissue paper that the children added freely to their cardboard collage. Once done with that I set out trays with our spin art treasures. The children picked some and glued them on top of their Mixed Media Collages. Everything was so intriguing and many discoveries were made: smudging the pastels with our fingers, discovering patterns in the cardboard, layering colors and materials, watching crayons repel the watercolors etc.


Step 5: Attach a hanger
We taped some string to the back to create a hanger. Aren’t they just lovely?


Enjoy!
♥ Claudia.


