
Your heart is a horizon of endless possibilities. – Gemma Troy
Create your own heart string art with this fun and easy project! Younger children might require a bit more assistance but they do love working with hammer and nails and are usually fascinated by the patterns they can create with string or rubber bands!
Offering quality art materials and advanced techniques can benefit children in many ways. A good paintbrush and high pigmented paints will go a long way in making your child feel successful; and being trusted with a grown-up tool not only motivates children to create but also builds confidence because you trust them enough to handle such (and any future) responsibilities!
Materials
- Wood panel
- Nails (about 3/4” long)
- Hammer
- Embroidery string or rubber bands
- Paper and pencil
- Crayons or oil pastels
- Watercolors (for brighter colors use liquid watercolors)
- School glue stick
- Scissors
- Collage materials (stickers, tissue paper shapes, scrap construction paper, washi tape etc.)
Step 1: Draw on your wood panel
Invite your child to scribble on the wood panel using crayons or oil pastels. We’ll only need a few scribbles, swirls or lines. There is no need to color the whole wood panel since we still want to watercolor on it. Older children can draw more complex lines and shapes.

Step 2: Paint your wood panel
Use watercolors to paint right over the crayons/oil pastels. Watch as the crayons magically repel the watercolors (watercolor-resist). Remember that water and oil don’t mix? The paint will soak into the wood but beads right off the oily crayons.
Tip: Limit your watercolor choices to different shades of one or two colors so that your background colors won’t distract from your string art. Let your child pick from different shades of e.g. pink and purple; or yellow, red and orange; or warm or cool colors etc.

Step 3: Collage on your wood panel
Set out containers with choices of colorful stickers, cut tissue paper shapes, construction paper shapes and some (pre-cut) washi tape. Invite your child to collage: Show how to glue a dot the size of the chosen shape onto the wood and press the shape onto it (I use purple glue sticks that dry white so the children can see where on the surface they are glueing).

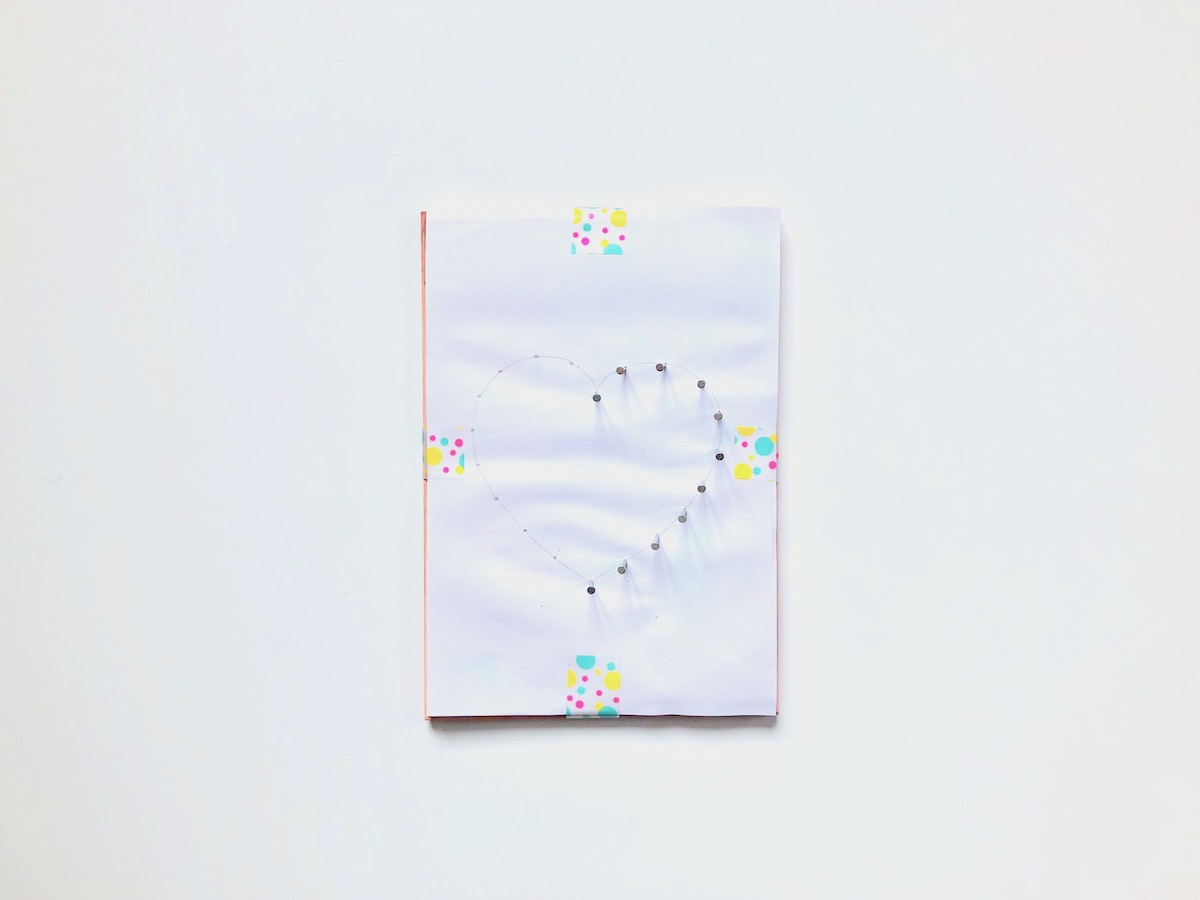
Step 4: Sketch a heart
Draw a heart (or any other design) on a piece of paper the size of your wood panel.

Step 5: Outline the heart with nails
Once dry, center and tape your design sketch onto the wood panel. Following the outline of your sketch, start hammering nails into the wood right through the paper, about 1/2″ apart from each other. When you’re done tracing your entire sketch, remove the paper carefully.
Step 6: Outline the heart with string
Tie the embroidery string to a nail (double knot) and cut off the excess. Randomly start wrapping the string from nail to nail. Continue until it looks how you want it. When you’re done tie off the end to one of the nails and cut off the excess.
Tip: Younger children can use rubber bands to string their design from nail to nail. This is easier and more fun for them. It will allow them to make their own choices and to create independently without major help from you.

 Have fun!
♥ Claudia.


